The technique I'm about to share with you is one I've done many times, using different water based inks and dyes. For some time now, I've been wanting to give this technique a try using Glimmer Mist. Well, today is the day. LOL
To get started .. here is what you'll need.
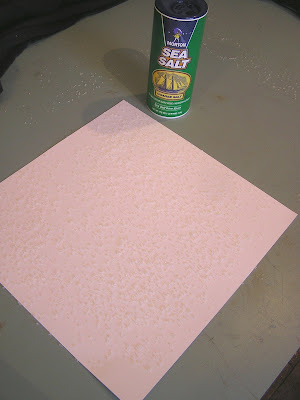
Rock Salt or Sea Salt: You will get a more defined pattern the larger the salt pieces. I normally use Rock Salt, but this time I used Sea Salt. It has a more subtle effect, but beautiful nonetheless.
White cardstock
Glimmer Mist (your choice of colors)
_______________________________________
Very Simple. Just sprinkle the entire area of your paper with the salt.
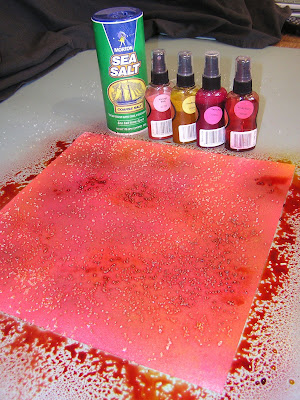
 Choose the color(s) you would like to use. Spray the entire area of the paper with Glimmer Mist. (You can also use Walnut ink, Poss Impressions, Color Washes, Watercolors, etc.)
Saturate the paper. (It works best if you get it very wet.)
Then, either walk away and let it dry... or if you're a bit impatient like I am and want to speed up the process, use your heat gun!
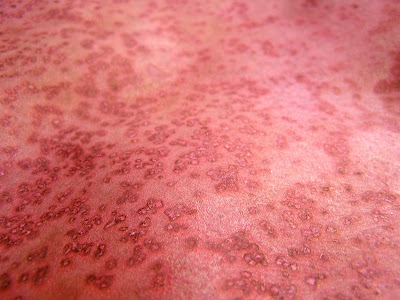
Once you're sure the paper is totally dry, brush away the salt to reveal the beautiful patterns.
Note: It is very important to make sure your paper is completely dry before removing the salt, in order to get the best results.
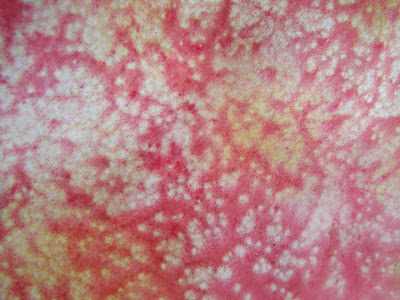
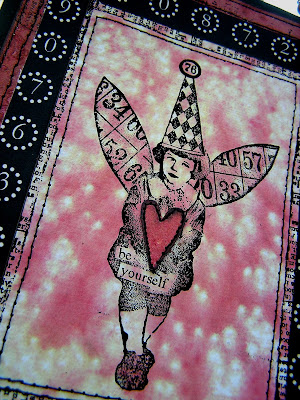

Cool technique!
ReplyDeleteVickie, I am so glad to see your wonderful talent get a greater audience. You are amazing! This is lovely.
ReplyDeleteI'll bet the shimmer on this is outrageous! I think I did this years ago, but not with GM. Wouldn't Black Cherry and Key Lime Pie look good together? HMMM....Your project turned out wonderfully! Love it!
ReplyDeleteYour new blog is off to a great start! I always enjoy your tutorials and love your projects. Can't wait for the next one!!
ReplyDeleteVicki,
ReplyDeleteCongrats on being on the AA DT. I've done this technique with other materials but never considered it with glimmer mist. I bet it's absolutely gorgeous and shimmery irl. Great project! I will be visiting here often.
Susan
How cool is that?!? I know I'd be like you and have a hard time deciding which side I like better...your card is charming!
ReplyDeleteThank you for the tutorial and sharing. I try the salt technique too for a time, but it don't work so well. When I see your beautiful card I must try it again:-)
ReplyDeleteBest wishes from germany,
Anja
Way cool Vicki...I never would have thought of this! Lovely effect! Thanks for sharing. AGP
ReplyDeleteVery Cool look!!!
ReplyDeletethis is awesome! thank you so much for sharing and i will be back!!
ReplyDeleteVery cool! I would have never thought to use Sea Salt. Thanks for sharing.
ReplyDeleteThanks for the link...great project...can you tell us how you did the little boy? Is that Crafty Secrets paper, or a rubon? Doesn't look like an old photograph...LOVE your stuff..
ReplyDeleteOh how exciting! I love this new blog with instructions! I can learn how to do the really fun stuff. Still have to get some glimmer mist. I have a long list of things I want now. Thanks Vickie!!!!!!
ReplyDeleteSmooch!
Love this Vicki! Very cool effect. thanks for teaching us how to do this. Can't wait to see more fun from this blog.
ReplyDeleteLove the project, Vic! I'm going to have to get some of the 'high' color glimmer mists to try this. I have oodles of the pearl and gold but I don't think this techie would show up that well with them. TFS!
ReplyDeleteLiv
This project idea is an easy one to do and with such an awesome result.... thanks for the hints..... I'm going to have to expand my colors of Glimmer mist....
ReplyDeleteLove it! Never thought about trying this technique with the glimmer mist!!
ReplyDeleteSo easy! Gotta try this one. Thanks Vicki!
ReplyDeleteWhat a great technique, thanks for sharing!
ReplyDeleteVery kewl, Vicki!
ReplyDeleteSo glad to see you're gonna have a wider audience with this blog. I said it before and I'll say it again: you da Queen of Vintage! LOLOL
~Hugs, Deb
Amazing effects! I no longer have to sit and stare at my Glimmer Mist. I'm going to dust them off and try this technique...
ReplyDeleteAgain, thanks for sharing - I adore your work!
OOOOOOHHHHHH....I just love this technique!!! I hope you don't mind if I use that in a class soon. I think new scrapbookers would love it!!!
ReplyDeleteOh I just love this! You are such an inspiration!
ReplyDeleteHi there. What stamp is that?
ReplyDeleteI love it. This is amazing!
Ok, I need to know what stamp this is and what size. It looks so big.
ReplyDeleteGorgeous.
ReplyDeleteHi Vicki
ReplyDeleteYou did such an amazing job! I love it!!! Thanks for sharing.
Prim Blessings, Linda :)